"Let the youthful female exhibit without shade as much of her bust as shall come within the limits of fashion, without infringing on the borders of immodesty. Let the fair of riper years appear less exposed. To sensible and tasteful women a hint is merely required." - "
On the Detail of Dress,"
The Mirror of the Graces by a Lady of Distinction, 1811
 |
| Front-lacing Regency Short Stays |
Short stays, long stays, half and transitional stays! Pull up a seat and stay a while as today's post is all about the making of my new Regency short stays.
Historical Inspiration
Much like the variety in the types of stays during the Regency period, there were many styles of short or half stays. I pulled my inspiration for this project from several extant examples and period fashion plates.
 |
Regency underclothes from an 1824 reprint of the Book of English Trades (1811).
(Image source: Public Domain via Wikimedia Commons)
|
 |
Short Stays, 1800
"The front part [is] closed by lacing (string original), and stiffened
by thin horizontal and parallel brass springs inserted between fabric and lining."
(Image source: Abiti Antichi Gallery) |
Construction Details
My version is constructed from an outer layer of white cotton twill and an inner layer of a natural-colored cotton drill. I used the pieces from the
Sense & Sensibility Regency Underthings Pattern, and decided to machine stitch most of the garment with some hand finishings (flossing, binding and eyelets). I did make one mock up, but choose not to correct the fit as these are intended for use as a teaching example and for children to try on, rather than actual wear.
As for the process, the sewing was very straightforward. The most time consuming aspects would be the fitting (as I could tell that it would have requited quite a bit of alteration to properly support me straight from the pattern), followed by the gussets.
 |
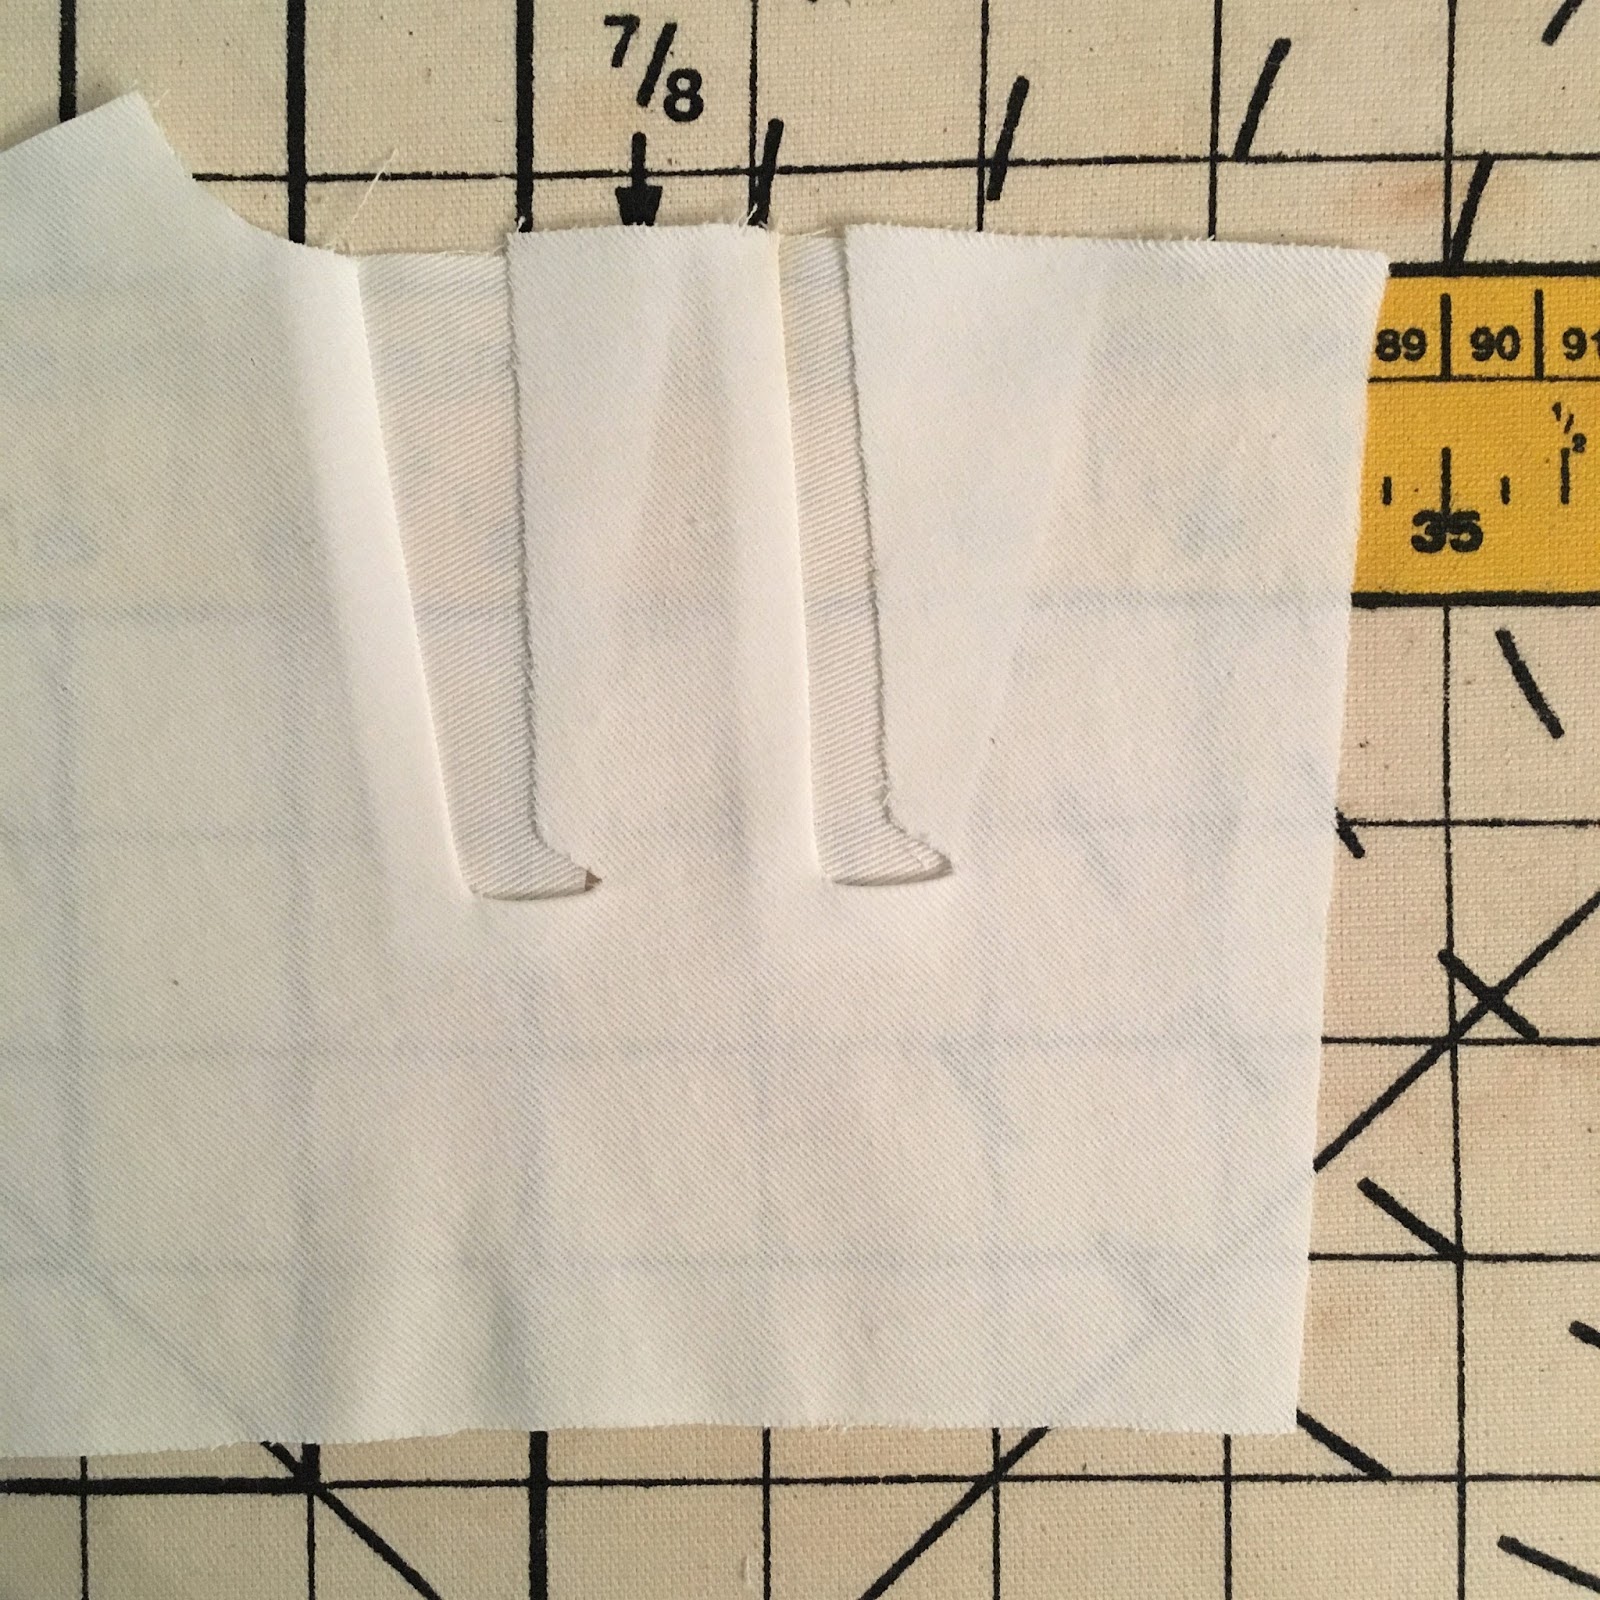
| Step one: cut gusset slits and attach the first side, right sides together. |
 |
| Step two: don't skip the pressing! |
 |
| Step three: attach the other side matching right sides together. |
 |
| Step four: top stitch along the outer edge to secure the gussets. |
 |
| Step five: press and repeat with the other side as well as the lining. |
Once I finished all of the gussets, I stitched the lining and fashion fabric layers separately. Then, to join them, I stitched the fronts, right sides together and basted along the upper and lower edges. I also stitched-in-the-ditch along the side, side back, and shoulder strap seams.
 |
| The lining and outer layers were stitched together separably. |
 |
| Joining the lining and outer layers. |
On each side, I added two metal bones near the eyelets, and two plastic bones along the sides of the gussets as well as the side seams. Six bones per side and twelve bones total.
 |
| Six bones per side, twelve bones total in the short stays. |
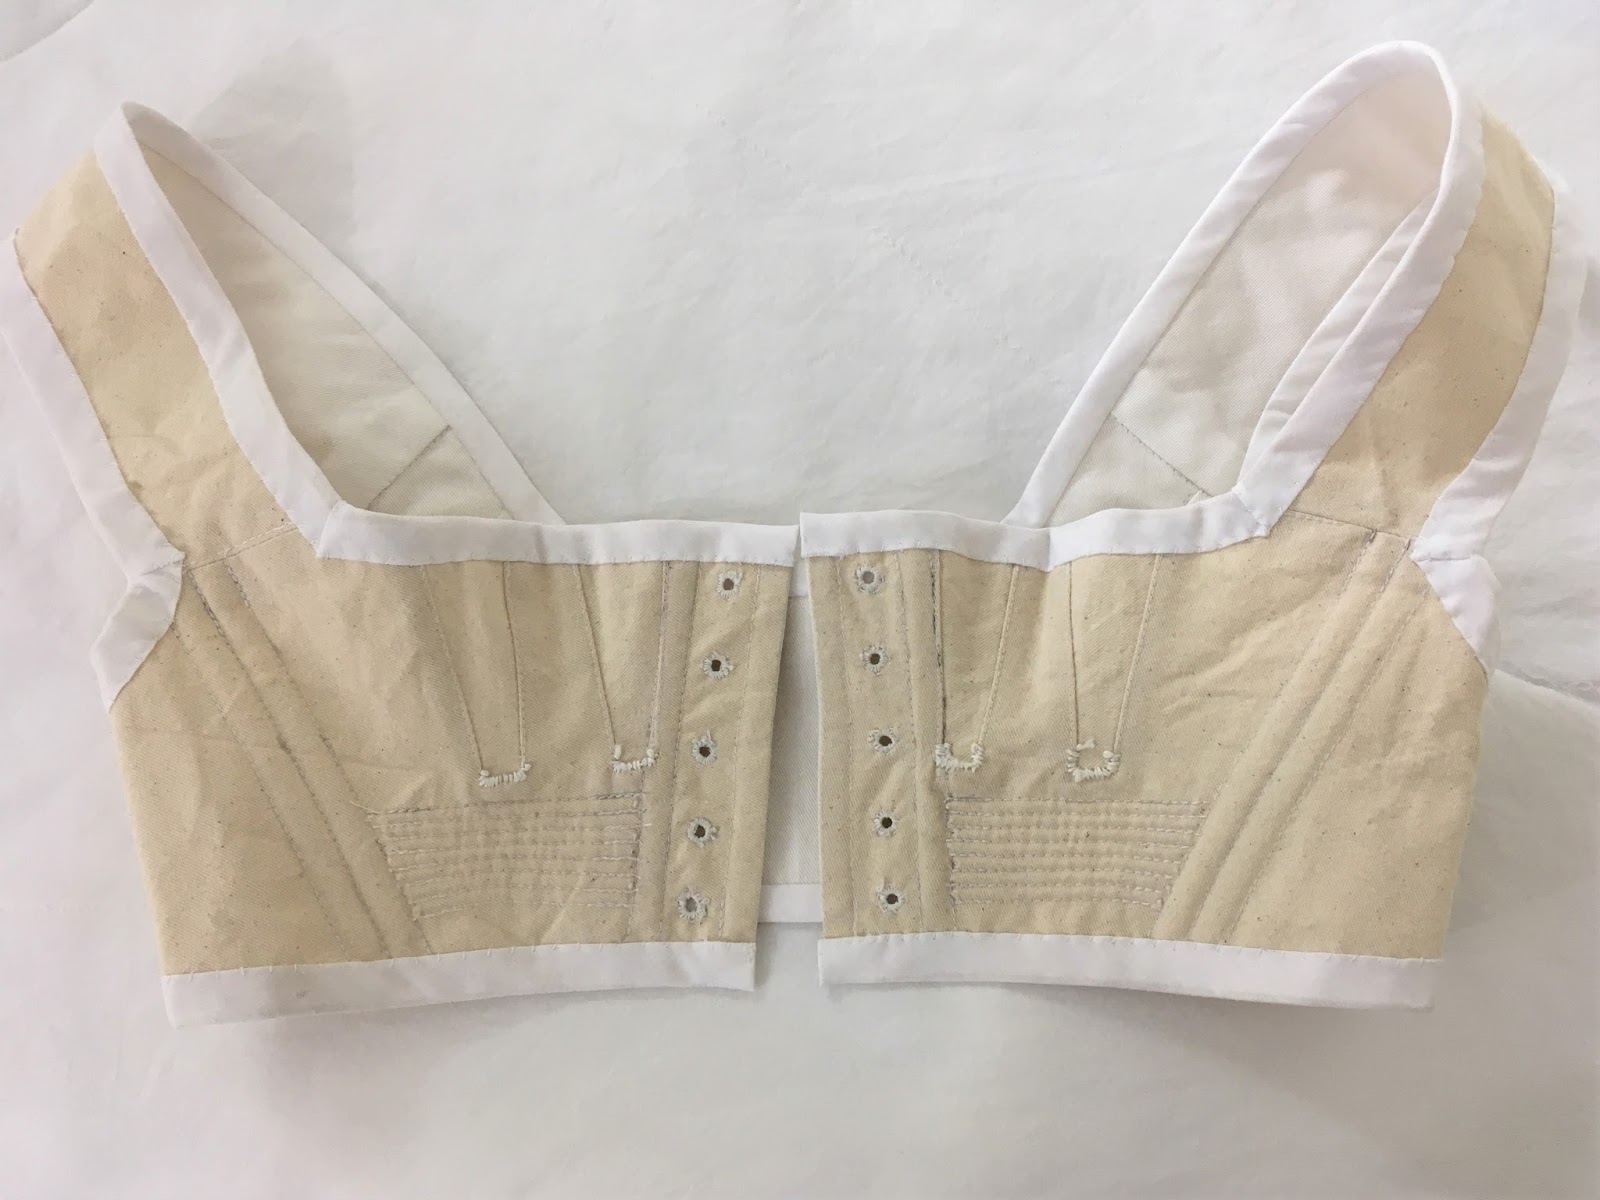
To finish, I stiffened the fronts with seven rows of cording per side, and bound the top, armscye, and bottom edges with cotton bias tape. I made five hand-stitched eyelets on each side for lacing, and flossed the gussets with white embroidery floss for stability and a last decorate touch.
 |
Each side features seven rows of cording, five eyelets and flossed gussets.
So happy with how the hand-stitched eyelets turned out! |

Completed Project Shots
 |
| The completed short stays, front. |
 |
| Side front. |
 |
Side back.
|
 |
| Back. |
 |
| Lining, front. |
 |
| Lining, back. |
Now, off to make a pair of long, corded stays with a busk!
Recommended Resources
- An Overview of Regency Stays/Corsets - A great article by the Oregon Regency Society that offers a breakdown of short, transition and full stays with busks. Helpful sample pictures and pattern recommendations are also included.
- Achieving a Proper Fit with Regency Stays - The members of the Oregon Regency Society once again provide an clear analysis of early stays, dispelling myths about stays vs. corset shaping. The support and proper silhouette comes from the pattern and cut, rather than boning and waist cinching, as the instructions illustrate.
- Half Stays a la Paresseuse - An excellent article written by Sabine of the Kleidung um 1800 blog and all-things-Regency-fashion fame! Her research includes a wealth of period sources and references.
- Short Stays' Studies - Schnürleib Studien - Another study done by Sabine, the reining champ of short stay research, on her blog: Kleidung um 1800!


Why did you choose to only do two layers despite the pattern calling for 3? Also, how exactly did you put in the horizontal layers of cording?
ReplyDeleteHi Amber! Using two layers rather than three was a personal choice. I found the materials sturdy enough without an inter-layer, plus there's a lot of cording and boning for support too. Also, these were for display and play in a children's fashion program, and not intended for much wear. Even then, I would probably still choose the two layers to reduce bulk and for greater comfort during the summer months!
DeleteFor the horizontal cording, I first stitched channels (following the width of the presser foot) and then threaded the cording through the inner layer using a tapestry needle. It's also possible to just lay the cording in the channel and stitch it in place with a zipper foot. Hope that helps!
Thank you so much for having a better short stay pattern available! I was trying to figure out how to shorten a long stays pattern...ugh...
ReplyDelete